
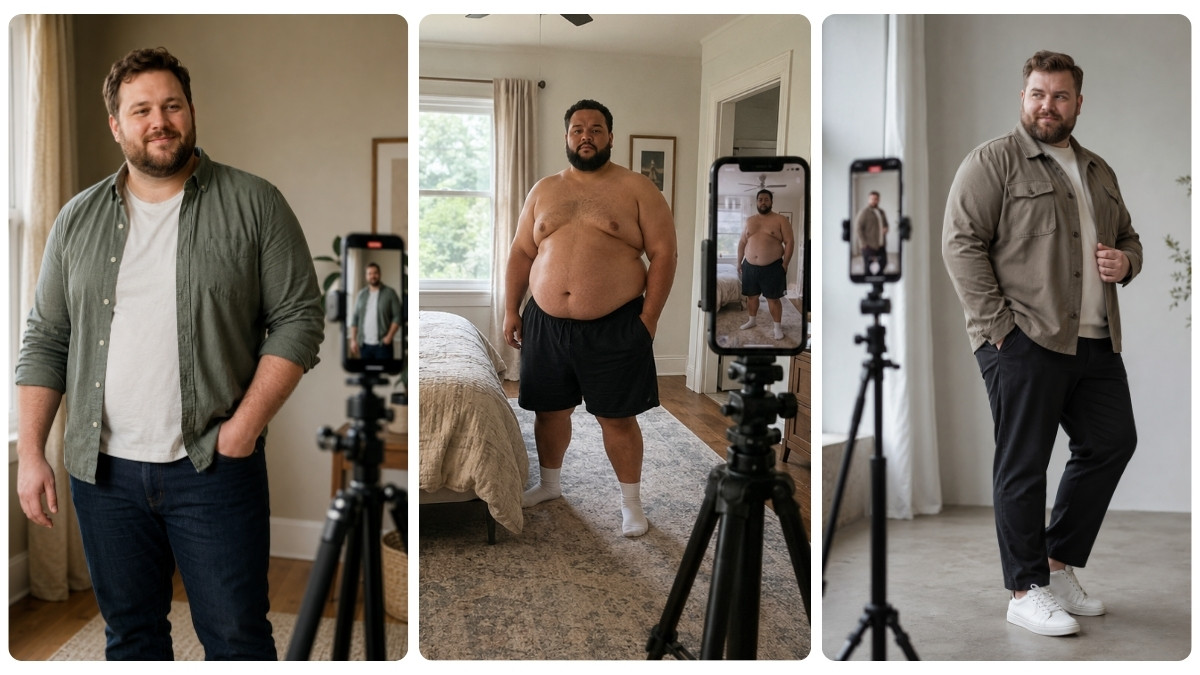
You ask your buddy to snap a quick photo before you head out, and the second you see it, your stomach drops. Your shoulders look hunched. Your stomach looks bigger than it feels in real life. Every angle seems to add weight you swore wasn’t there yesterday.
None of this means the camera is right and you are wrong. Most of the time, the real problem is distance, lens choice, and how you are standing, not your body. Once you fix those three things, the photos start matching how you actually feel in the outfit.
Your Phone’s Camera Is Already Working Against You
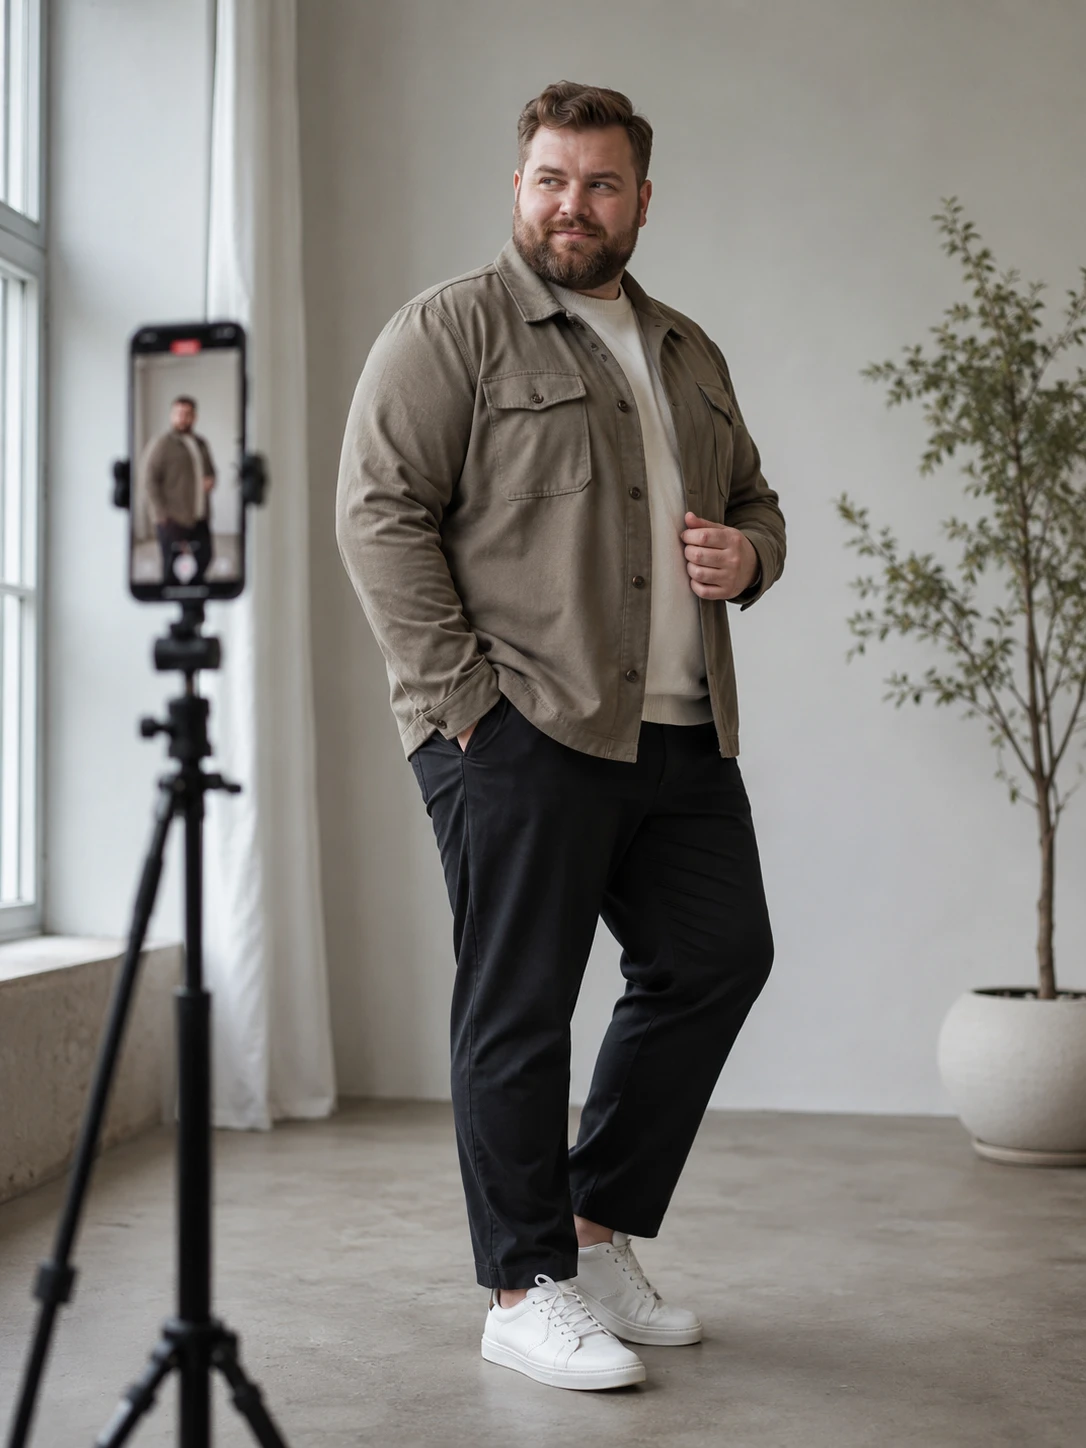
Stand six feet back from your phone and the same body looks completely different. That gap right there is the actual problem, not your size. Wide angle lenses on smartphones bend and stretch whatever sits closest to them.
Get within three or four feet and your stomach, chest, or arms absorb that stretch first because they’re nearest the lens. This is basic optics. It happens to every single body type, but it shows up more on larger frames because there’s more surface area for the distortion to grab onto.
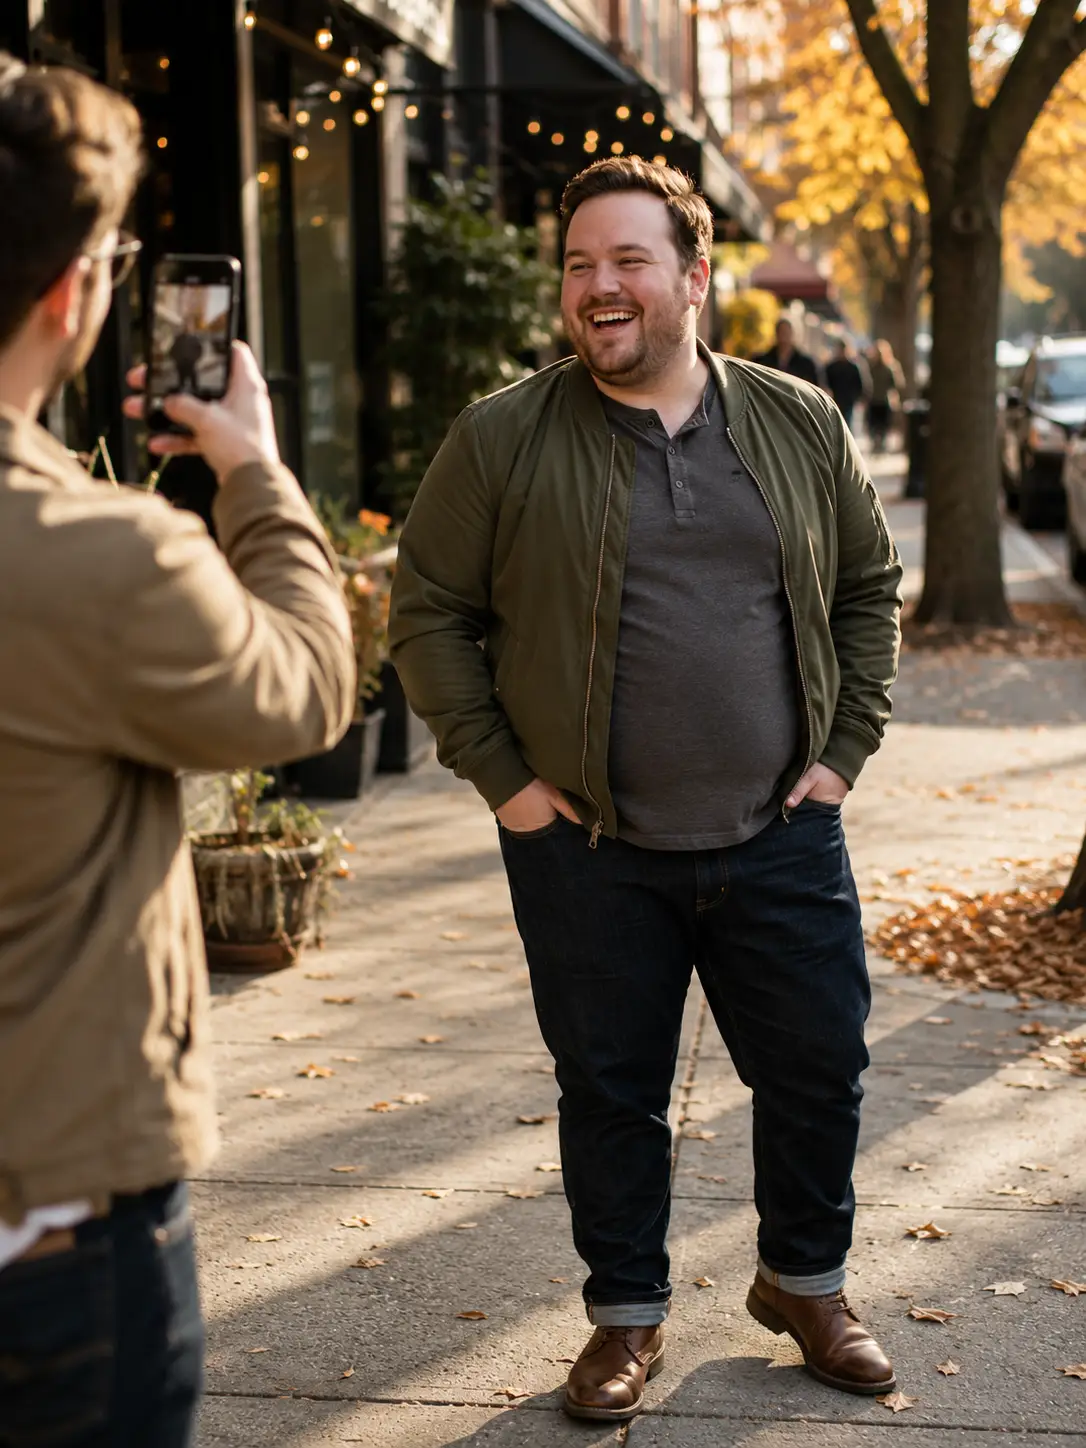
Most men blame their body after a bad photo. The real issue is usually a phone propped too close on a dresser or held at arm’s length for a mirror selfie. Both situations put the lens within that danger zone where warping happens.
Move the camera back. Ten to twelve feet is the sweet spot for a phone camera shooting a full body shot. Use the zoom function instead of walking closer, since zooming compresses the image rather than stretching it.
Lighting plays a role too. Harsh overhead light creates shadows that add visual bulk in places you don’t want them. A window with natural light hitting you from the front or side does more for your photo than any pose ever will.
Camera Setup Fixes
| Problem | Quick Fix |
|---|---|
| Phone widens your body up close | Step back 5-6 feet and zoom to 1.4x or 2x |
| Low angle adds bulk to chin and chest | Hold the camera at eye or chest level |
| Harsh sun creates shadow lines | Shoot in open shade or an hour before sunset |
| Indoor light looks flat or yellow | Stand near a window facing soft daylight |
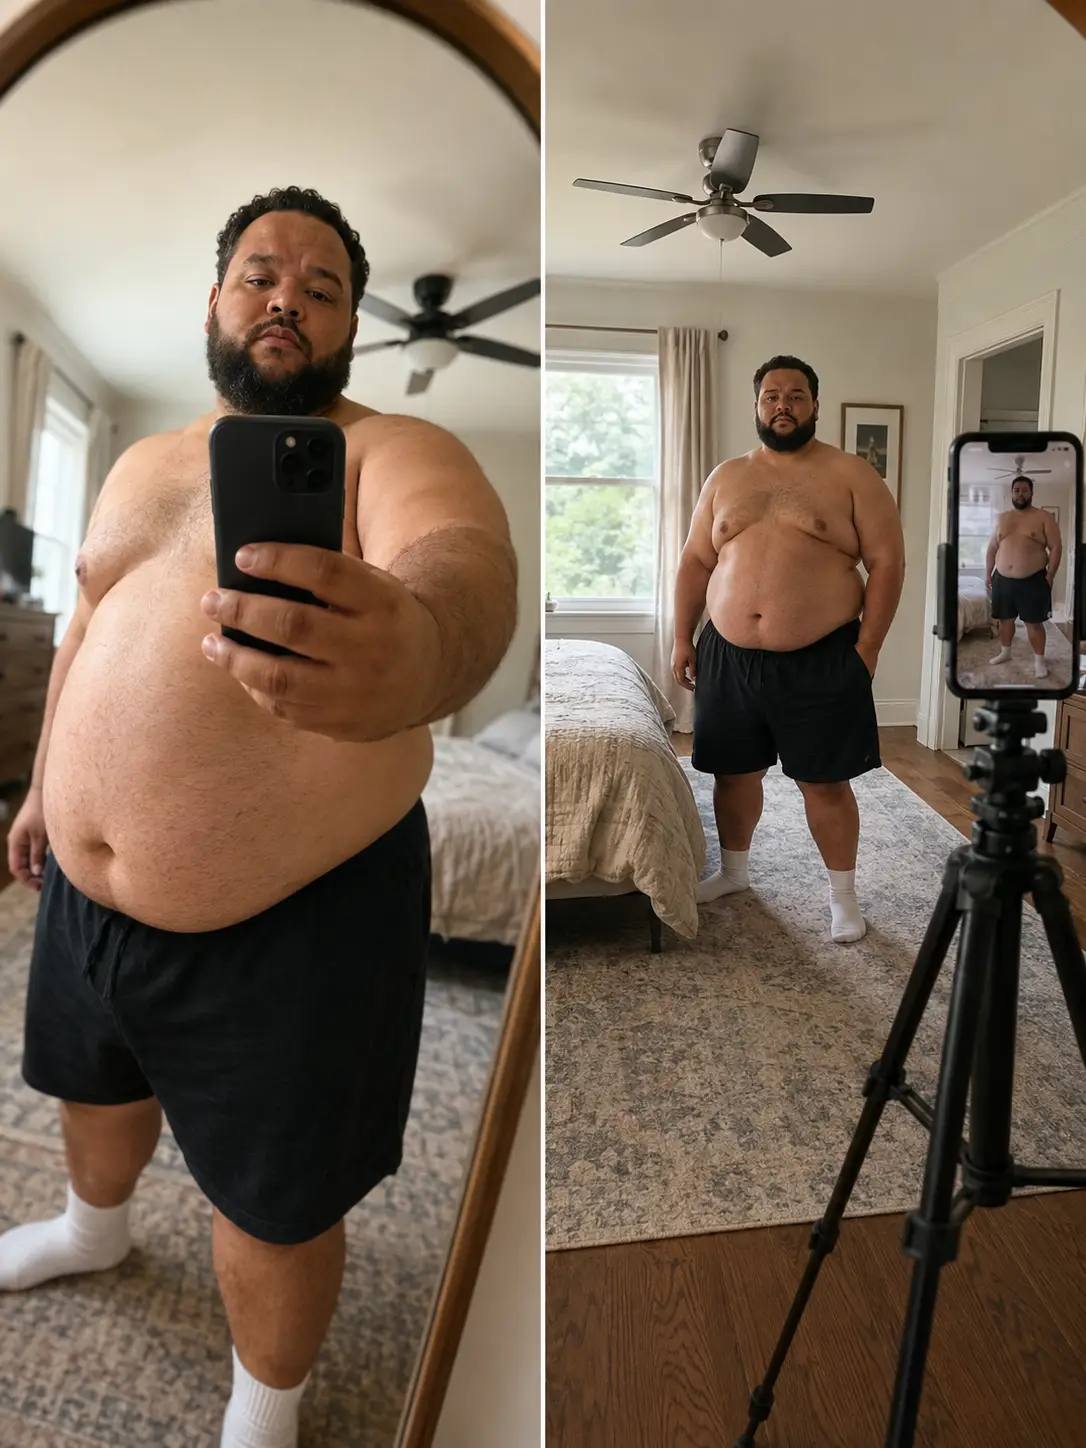
Fix Your Distance and Zoom Before You Pose
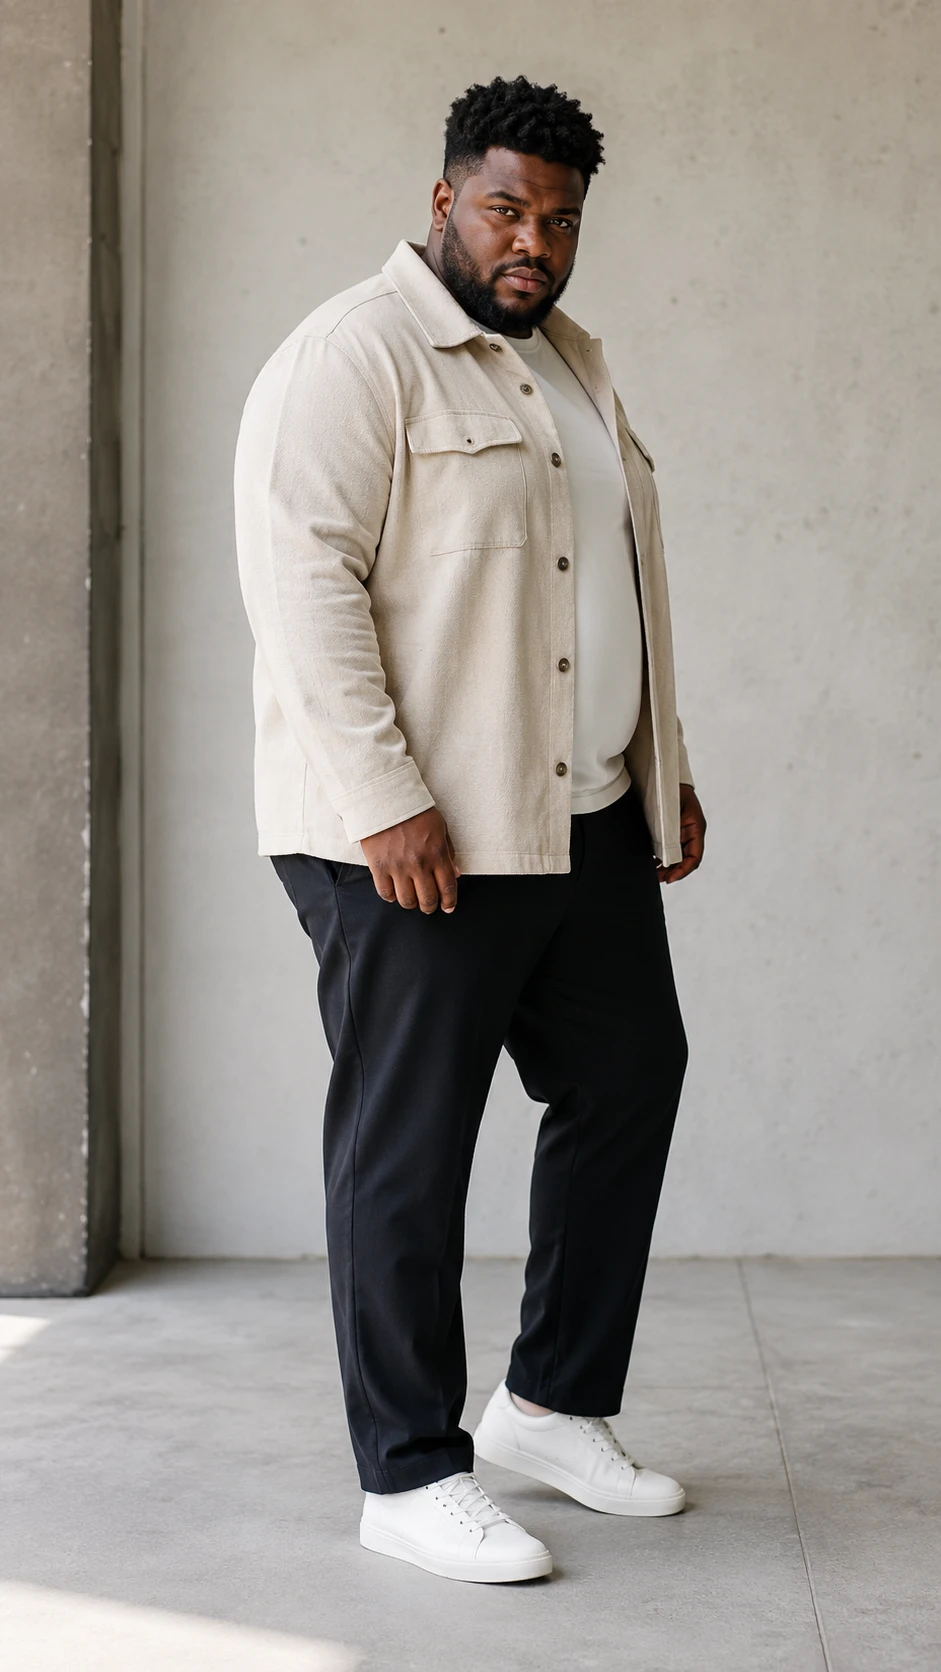
Stand back five to six feet from your camera before you snap anything. This single change fixes most of the distortion that makes plus-size men look wider than they are. Phones warp your body when the lens sits too close, stretching your midsection and shortening your legs.
Use your Zoom too. Set it between 1.4x and 2x instead of shooting at the standard wide angle. This flattens the image and shows your real proportions, not an exaggerated version.
Camera height matters just as much. Place your phone at eye level or chest height, never below your waist. A low angle adds bulk to your stomach and makes your frame look stacked instead of tall.
- Step back and zoom: Never take a portrait at the default 1x wide-angle smartphone lens. Have your photographer or tripod stand at least 5 to 6 feet away and zoom in to 1.4x or 2x to compress the frame and keep your proportions natural.
- Keep the camera at eye or chest level: Avoid low angles that look straight up at your chin, which accentuate bulk. Keep the camera level or slightly elevated to elongate your profile.
- Find open shade: Direct, harsh overhead sunlight creates unflattering shadows that accentuate lumps and bumps. Shoot in even, soft, open shade or during the hour before sunset.
Pick Light That Doesn’t Add Shadows You Don’t Have
Overhead sun is the enemy here. It hits your shoulders and chest straight down, then drops a hard shadow under your chin, your arms, and your stomach. Those shadows read as extra bulk on camera, even when they’re not there in real life.
Open shade fixes this fast. Stand under a tree, a porch, or the shaded side of a building, and the light wraps around you instead of carving you up.
Golden hour works too. Shoot an hour after sunrise or an hour before sunset, when the sun sits low and soft. Skip noon entirely. Harsh top-down light will undo a great outfit and a great pose in seconds.
- Soft, even light is the goal. Anything harsh from above or to one side will carve out shadows that aren’t really there.
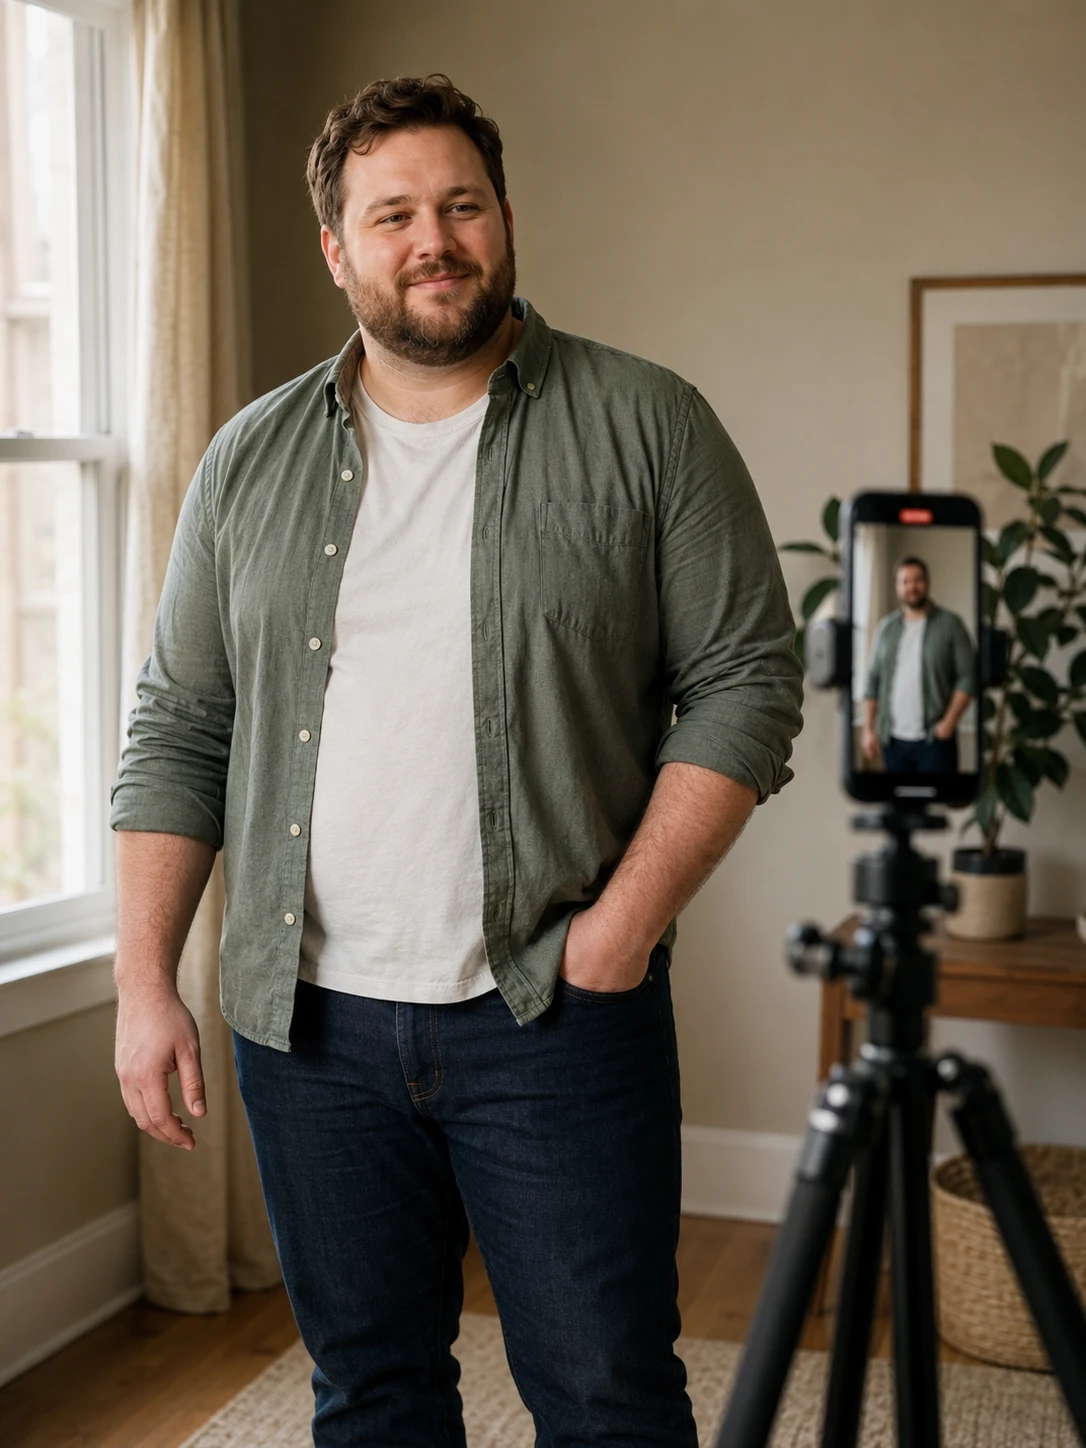
- Use window light facing you, not behind you. Stand facing a window so light hits your face and body evenly. Light from behind turns you into a silhouette.
- Avoid direct overhead light. Ceiling lights and midday sun cast shadows under your eyes, chin, and stomach that exaggerate areas you don’t need exaggerated.
- Shoot during golden hour outdoors. Early morning or just before sunset gives soft, flattering light without harsh contrast.
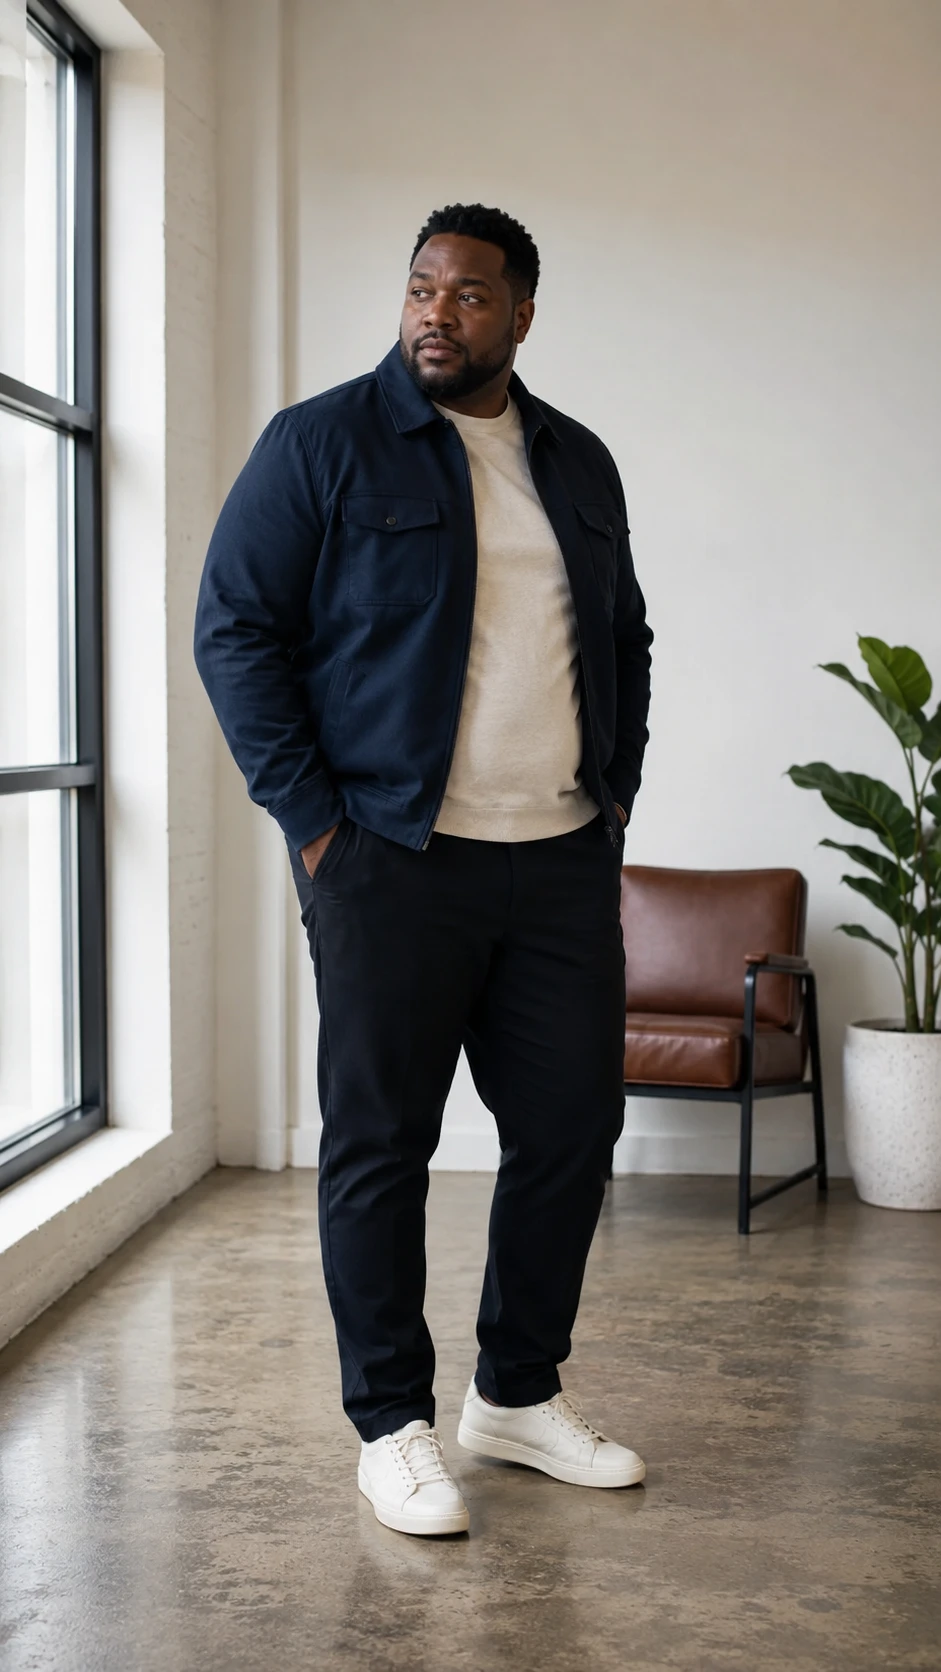
Standing Square to the Camera Is Costing You Your Shape
Facing the camera head-on adds visual width to your frame instead of hiding it. Your shoulders, chest, and stomach all show up at their widest point when you square up to the lens. Turn your body about 45 degrees instead.
Point your toes toward an angle, not straight ahead. This single shift carves out natural lines along your side that a flat-on shot simply cannot show. Bend your front knee slightly to break up stiffness. Keep your back arm relaxed at your side, away from your body.
Pictures taken at an angle read as taller and more put-together. Try placing one foot slightly in front of the other for added depth. Practice this stance a few times before the camera even comes out.
Posing Fixes
| Problem | Quick Fix |
|---|---|
| Standing square looks wide and blocky | Turn lower body 45 degrees, twist chest back to camera |
| Weight on both feet looks stiff | Shift weight onto your back leg |
| Double chin shows up in photos | Push your chin slightly forward and down |
| Arms hanging straight look awkward | Hook a thumb in your pocket or adjust your cuff |
The 45-Degree Turn That Instantly Adds Structure
Turn your body 45 degrees away from the camera and the whole photo changes. This single move breaks up the flat, wide shape that a square-on stance creates. Shift your weight onto your back leg and let your front leg relax slightly.
Your shoulders should follow the same angle as your hips, not twist against them. Drop your chin down and slightly forward, then look back up at the lens. This trick tightens the jawline and removes the harsh angle that a straight-ahead camera creates.
Keep your arms slightly away from your torso instead of pressed flat against it. Small gaps create shape. Practice this stance in a mirror until it feels natural, not stiff.
- The 45-Degree Pivot: Instead of facing the camera straight on, turn your lower body at a 45-degree angle away from the lens. Then, subtly twist your chest and shoulders back toward the camera to trim your profile visually.
- Shift Your Weight: Plant your weight entirely on your back leg. This naturally pushes your hips back slightly and brings your chest forward, lengthening your overall line.
- The “Turtle” Chin Trick: To define your jaw and eliminate a double chin, push your chin slightly forward and down toward the lens. It feels strange in person, but from the camera’s perspective, it pulls the skin taut and chisels your jawline.
Give Your Hands a Job
Your hands give away a bad photo faster than anything except a flat pose. Dead arms hanging straight at your sides add visual width you don’t need and make the whole shot feel stiff. Give your hands a job instead.
Hook your thumb into a pocket. This single move bends your elbow, creates space at your waist, and instantly looks more natural. Try a light layering adjustment too. Touch your jacket lapel or tug a button as if you’re mid motion.
Small, real actions read as confident, not posed. A cuff pull works the same way. Reach down and adjust your sleeve for a second before the shot. Photographers count this trick among the easiest fixes for awkward arms. Pick one technique per photo and let your hands actually do something.
- The Thumb Pocket Hook: Slide your thumb into your front pocket while leaving your fingers out. This creates a sharp bend at the elbow, framing your waist nicely without looking overly forced.
- The Layering Adjustment: Lightly hold the edge of your jacket, blazer, or overshirt as if you are about to button it.
- The Cuff Pull: Look down and use one hand to adjust the watch, cuff, or sleeve of your opposite arm. This shifts your shoulders into a natural slope and takes the focus away from a frozen facial expression.
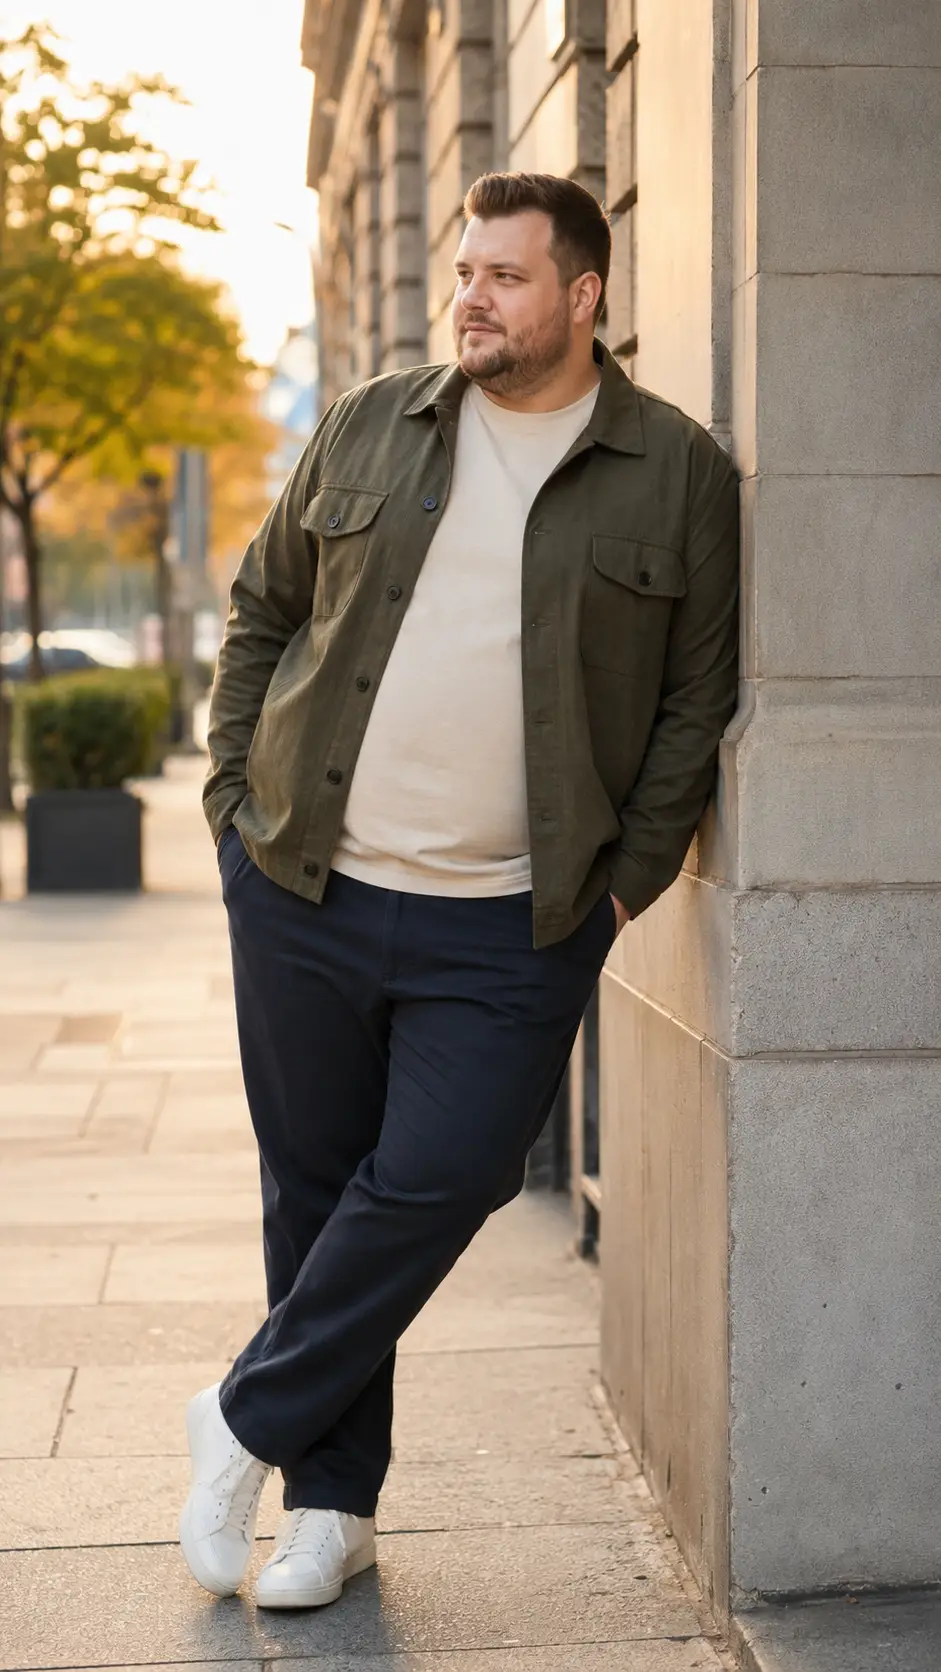
Poses That Don’t Require You to Stand Still and Stare
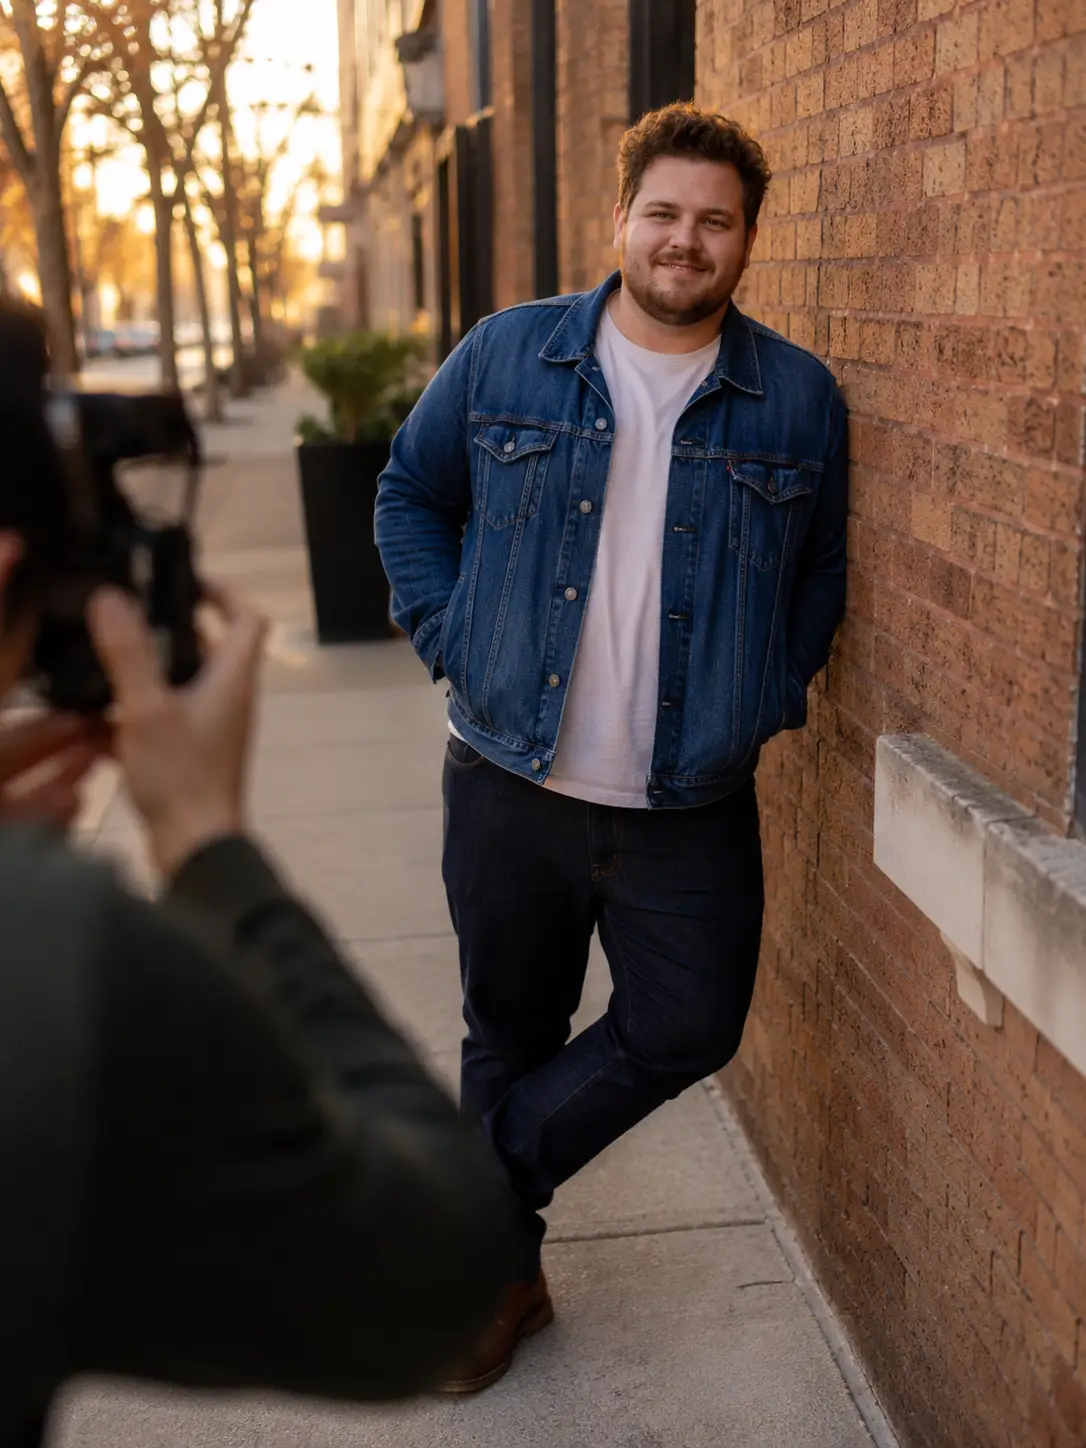
Standing straight and staring at the camera feels stiff for a reason. It is stiff. Try a wall lean instead. Find any wall, doorframe, or fence post, lean your shoulder against it, and cross one foot over the other. This pose hides nervous hands and gives your body a natural angle that photographs well.
Walking shots solve the staring problem completely. Have someone snap a few frames while you walk toward or past the camera. Look slightly off to the side instead of straight ahead. Movement reads as confidence even when you don’t feel confident yet.
Sitting works too, and it takes almost no effort. Grab a step, a bench, or a curb. Rest your forearms on your knees, or lean back on your hands. Your face gets a break from holding one expression, and the photo looks like a real moment instead of a posed one.
Try Low-Stress, High-Confidence Poses
Say this exact line before you hand someone your phone: “Can you snap three or four? I’ll pick the best one.” That sentence does all the work for you. It sets an expectation upfront, so asking for a retake later feels normal instead of needy. Most guys freeze up here. Asking twice feels like an imposition. It isn’t.
Give simple direction instead of vague feedback. Skip “that one’s bad” and try “can you step back a little” or “try one from a bit lower.” Specific requests get specific results, and they remove the guesswork for whoever’s holding the camera.
Treat it like asking for help with anything else. A quick “thanks, this helps a lot” at the end keeps things light.
The Casual Wall Lean: Find a solid wall or pillar and lean your shoulder or back against it at an angle. Cross one foot over the other. This naturally breaks up a blocky silhouette and lets you relax into a comfortable, secure pose.
The Paparazzi Walk: Set your camera to burst mode or have your friend snap rapidly while you actually walk slowly past the camera. Looking slightly away or down at the pavement captures authentic fabric drape and motion.
The Lean-In Sit: Sit down on a stool, bench, or stairs. Lean your elbows onto your knees while keeping your back relatively straight. Sitting opens up your jacket and allows fabric to fold naturally, minimizing midsection tension.
Pose Options by Comfort Level
| If You Feel | Try This |
|---|---|
| Stiff standing still | Lean your shoulder against a wall, cross one foot over |
| Self-conscious facing the camera | Walk slowly past the camera while it shoots in burst mode |
| Tense in your midsection | Sit on a bench or stairs and rest elbows on your knees |
| Unsure where to put your hands | Hold the edge of your jacket like you’re about to button it |
Hello there! I’m Jesse Joe, the author and editor behind SolganGenius. I’m thrilled you’ve stopped by, and I can’t wait to share with you the essence of what this platform is all about.
I’m a writer, social media enthusiast, and a firm believer in the power of words. I’ve always been fascinated by how a simple phrase or slogan can capture an emotion, convey a message, and even change perspectives. Learn More